Sunday, 30 April 2017

Post Processing

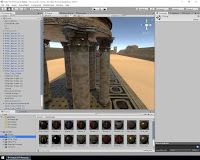
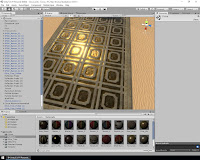
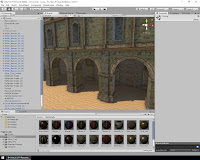
Now after all the struggling and pain in order to make the circus look appealing, comes time for the stuff I love doing. I forwarded a current version of the Circus to my client to see if there are any suggestions or if something needs changing.

I started enabling High Dynamic Range (HDR) and I used Unity's standard assets pack with image effects to get my screen space ambient occlusion to bring out the creases, antialising to smooth all the sharp and harsh edges, depth of field to create a more realistic overview from the player's perspective and so on.
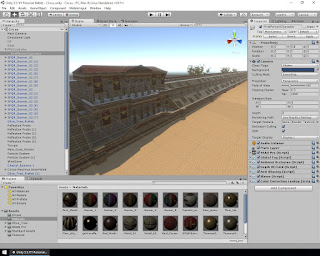
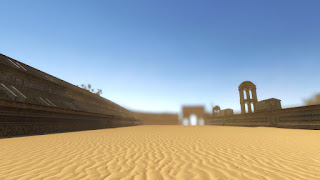


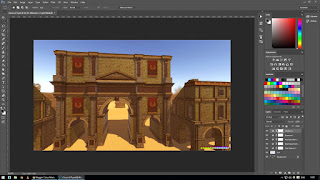
The global fog helped enforcing the dusty effect even more, and after that I did some colour correction in a very new way. I put a colour correction component on the camera and then took a screenshot of the game view, put it in Photoshop, did all my exposure, brightness, saturation and all the parameters I needed to tweak, and used it as an LUT ( Look Up Texture ) that stored all the colour information and brought it back in Unity. It changed the look drastically.
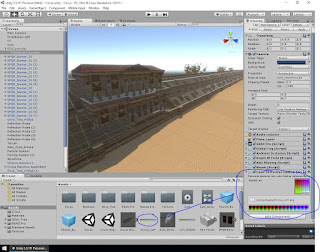

After I exported the build to test it out, I thought that I should also do a camera fly through animation to combine it with a gameplay footage as that will be a nice transition between clips. So I just started again in Unity, this time, disabling the FPS camera and enabling main camera with same post process effects so I can maintain the same level of quality.
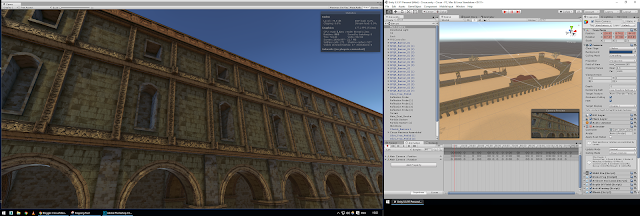


Now all that is left is to create renders and record some video and go into Adobe Premiere to edit and blend all the clips together so I have a nice presentation reel of the circus, and I am nearly done.

References

ConnorDuke - Game Development Tuts!, 2015. How To: Color Grading In Unity 5! - YouTube. [Online]
Available at: https://www.youtube.com/watch?v=iAnjIkmvwms
[Accessed 30 April 2017].
Unity Technologies, 2013. Unity - Color Correction Lookup Texture. [Online]
Available at: https://docs.unity3d.com/432/Documentation/Components/script-ColorCorrectionLut.html
[Accessed 30 April 2017].
 

Friday, 28 April 2017

Unity Issues

I noted that when you moved around with the camera, the fps count was throttling constantly and it wasn't a very smooth play experience. I searched on Unity website, again, and I found a brilliant way to optimize the assets even further. Basically, the camera from the player's perspective is only rendering objects that are in sight and gets rid of the other ones. This drastically improved my process and now I could walk around without worrying about stuttering anymore.


While wondering around and ensuring everything is on point, I forgot about animating the banners so they will move when affected by wind conditions. Then I realized I had to split the rail from the cloth so that I can specify how and what moves. Thanks to Unity's docs, again, I managed to get them moving and it looks awesome.


In order to make the banners move and specify how much you want them to move you have to assign a cloth modifier to the game object and tweak the acceleration values to achieve the wind condition you want. Then you have to go to edit constraints and paint the vertices that you don't want to move. You need to have enough vertices so the movement is more realistic, not just a flat plane. Basically the ones that are attached to the rail are not moving and then, to make it easier, I didn't paint all the weights, I just played around with the stretching and bending stiffness.


The scene still lacked something that made it pretty, then I just came up with the idea of creating like a sand dust or a sandstorm effect and for that I needed some help on Particle Systems in Unity. I started out modifying some basic parameters like spread, distance and I used an image to make little dust particles instead of default circular ones. I applied a WindZone to make the particles spread in a direction and emphasized the effect of dusty wind. Here I have some renders:


References

Unity Technologies, 2017. Unity - Manual: Cloth. [Online]
Available at: https://docs.unity3d.com/Manual/class-Cloth.html
[Accessed 28 April 2017].
Unity Technologies, 2017. Unity - Manual: Draw call batching. [Online]
Available at: https://docs.unity3d.com/Manual/DrawCallBatching.html
[Accessed 28 April 2017].
Unity Technologies, 2017. Unity - Manual: Occlusion Culling. [Online]
Available at: https://docs.unity3d.com/Manual/OcclusionCulling.html
[Accessed 28 April 2017].
Unity Technologies, 2017. Unity - Manual: Skinned Cloth. [Online]
Available at: https://docs.unity3d.com/460/Documentation/Manual/class-SkinnedCloth.html
[Accessed 28 April 2017].
Unity Technologies, 2017. Unity - Manual: Using Particle Systems in Unity. [Online]
Available at: https://docs.unity3d.com/Manual/PartSysUsage.html
[Accessed 28 April 2017].
Unity Technologies, 2017. Unity - Manual: Wind Zones. [Online]
Available at: https://docs.unity3d.com/Manual/terrain-WindZones.html
[Accessed 28 April 2017].
 

Tuesday, 25 April 2017

Substance Materials

For all my PBR textures I use Substance Bitmap2Material application because it is very easy to use and you can tweak values and adjust your textures very easily. I spent almost half of a day to get them how I wanted. I could also go back and change if I needed a different result as the workflow is very flexible. Unity has implemented it as well so you can do all your work straight inside the engine, but I just wanted to keep the modifications outside because it tends to get very messy as you progress.

I won't put all my textures here because I have so many, but just some to have an idea of how good the outcomes are compared to other methods, I found this one so easy and works flawlessly for me:


So the order is albedo, normal, metallic, glosiness, ambient occlusion. I know that for the PBR process there are 2 workflows: specular/glossiness and metallic/roughness. I chose the latter one, but Unity has a different approach on how PBR works inside the engine so if you are using the metallic workflow you need to invert your roughness map into a glossiness according to the tutorial, and that works just fine. Here is another example:


Same for this material as well, I skipped the metallic map as the relief has no metallic properties so I just used a black texture. Here I have some previews of the material in Unity:


References


Allegorithmic, 2014. Bitmap2Material 3 - Walkthrough Tutorial. [Online]
Available at: https://www.youtube.com/watch?v=UKQTMHVOMKk
[Accessed 24 April 2017].
Unity Technologies, 2017. Unity - Manual: Metallic mode: Metallic Parameter. [Online]
Available at: https://docs.unity3d.com/Manual/StandardShaderMaterialParameterMetallic.html
[Accessed 24 April 2017].
Unity Technologies, 2017. Unity - Manual: Metallic vs Specular Workflow. [Online]
Available at: https://docs.unity3d.com/Manual/StandardShaderMetallicVsSpecular.html
[Accessed 24 April 2017].
Unity Technologies, 2017. Unity - Manual: Smoothness. [Online]
Available at: https://docs.unity3d.com/Manual/StandardShaderMaterialParameterSmoothness.html
[Accessed 24 April 2017].
Unity Technologies, 2017. Unity - Manual: The Fresnel Effect. [Online]
Available at: https://docs.unity3d.com/Manual/StandardShaderFresnel.html
[Accessed 24 April 2017].
 

Thursday, 20 April 2017

Circus Maximus Assembled

Hey everyone, I have completed assembling the circus. After I have ensured that all the pieces line-up properly and the unique pieces are placed accordingly, it doesn't look that bad at all. Here I will have some renders from Max compared to the original reference so you can see what I'm talking about:


Obviously, the lighting is not great as this is not my greatest skill but I can't wait to see hot it looks in the engine with the whole materials and textures applied, but I have to create them in the first place. Now I will go back and forth to find the appropriate scale for the environment in accordance to player measurements.

Now, here I am in Unity trying to achieve the perfect scale. After half an hour, I think I found the sweet spot. Here are some early previews:


I am so glad it imported with the materials assigned properly. Now I selected the whole circus and ticked the static box so all the lighting and shadows as well as calculations are a lot easier to process for the game engine. I also added a mesh collider on all of the assets so the player character can jump around and not get through them.

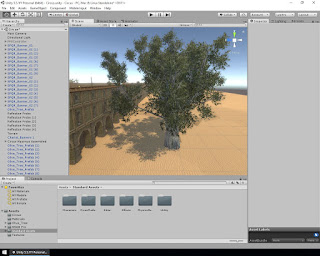
I need to build a terrain around so the players won't fall when spawning inside the circus. I started with just a simple plane to test the player camera and how it behaves. After, I watched a tutorial about the terrain tools in Unity since that gave a nice mesh and I could use a tiling texture without having to build it manually as with the circus, specifically a sand one. I downloaded some Mediterranean trees from the Unity Asset Store to break up the elongated lines along the circus stage area.


After working for some time in the engine, I wanted to ensure that engine is rendering colours and lighting properly for Physically Based Rendering (PBR) materials so I watched a tutorial from Unity showing how to change the settings of the project accordingly to get best results. I also took into account the Unity Material chart values for accurate representation of specularity for different types of materials since every engine handles them differently.

References

Allegorithmic, 2016. Substance for Unity: Chapter 01-02 Working with PBR in Unity. [Online]
Available at: https://www.youtube.com/watch?v=ypQ_VWWCnv4
[Accessed 16 April 2017].
Ferreira, R., 2016. Sand Desert Heightmap - Tutorial [Unity 5] (EN sub). [Online]
Available at: https://www.youtube.com/watch?v=rpY504Zxy7c
[Accessed 16 April 2017].
Immortal Factory, 2016. Assetstore.unity3d.com. [Online]
Available at: https://www.assetstore.unity3d.com/en/#!/content/61874
[Accessed 18 April 2017].
Textures.com, 2017. Textures.com - SoilBeach0087. [Online]
Available at: https://www.textures.com/download/soilbeach0087/32630
[Accessed 18 April 2017].
Unity Technologies, 2017. Unity - Manual: Terrain settings. [Online]
Available at: https://docs.unity3d.com/Manual/terrain-OtherSettings.html
[Accessed 18 April 2017].
Unity Technologies, 2017. Unity - Manual: Creating and editing Terrains. [Online]
Available at: https://docs.unity3d.com/Manual/terrain-UsingTerrains.html
[Accessed 18 April 2017].
Unity Technologies, 2017. Unity - Manual: Material charts. [Online]
Available at: https://docs.unity3d.com/Manual/StandardShaderMaterialCharts.html
[Accessed 18 April 2017].
Unity Technologies, 2017. Unity - Manual: Terrain Textures. [Online]
Available at: https://docs.unity3d.com/Manual/terrain-Textures.html
[Accessed 18 April 2017].


Sunday, 16 April 2017

3D Models Update

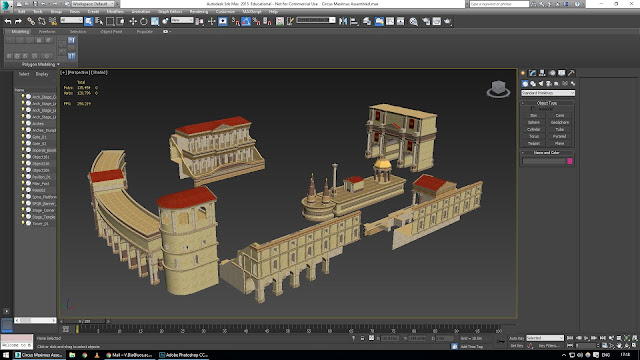
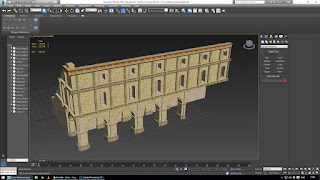
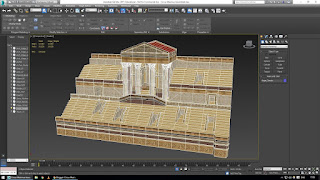
Here I have the result after 7 or 8 days of hard work re unwrapping totally in some places, but I think its really worth the effort. I have organised a scene with the pieces that will help me assemble the whole circus, with the material editor tidied up so that it will be easier on the long run. Here I have some screenshots straight from max showing wire-frame and poly counts as well:

Starting Gates


Tower


Stage


Temple


Triumph Arch


Imperial Box


Spina End Piece


Pavilion


All pieces


Now all that is left is to assemble the circus and I think I will do it in 3Ds Max because I am more confident in the snapping tool and I am more used to the shortcuts since I spent so much time inside it so far. In addition, I will have to put some bend modifiers on the pieces near the arch to make them curve around and also some of the pieces need to be mirrored and then I need to work on the UV faces in order to export the models to Unity properly.

I have also consulted my client and I keep him constantly up to date with the process so I can fix any issues or misunderstandings as early as possible. He was very satisfied with the overall look and quality of the assets.